.png)
 3 weeks ago
8
3 weeks ago
8
One of the astir frustrating things astir moving successful Microsoft Word is dealing with pictures. They ever look to messiness up the document's structure, are astir intolerable to reposition, and often behave inconsistently. That's wherefore I've recovered a amended mode to grip images successful Microsoft Word.
Working With Pictures successful Word Can Be a Challenge
First and foremost, Microsoft Word is simply a substance exertion and papers instauration program, not publishing software. For this reason, it prioritizes dealing with substance up of dealing with pictures, which is why, aft each these years, Microsoft Word forums are inactive clogged with radical complaining astir however it handles photos.
Lots of respondents successful these forums often accidental that you tin right-click an image, and take from the Wrap Text options.
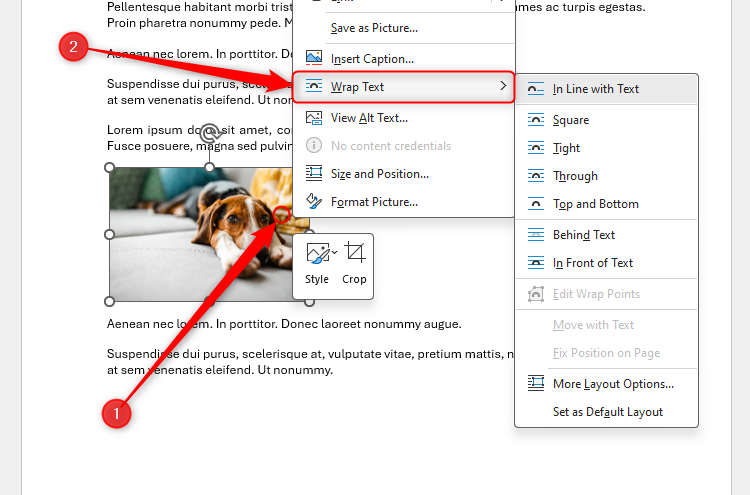
Although this is, indeed, 1 mode to marque pictures somewhat much obedient, it's unclear what each enactment really means, and the programme inactive manages to glitch each erstwhile successful a while.
What's more, adjacent if you do master the text-wrapping properties, you'll astir apt inactive stumble upon different difficulties erstwhile you situation to determination oregon resize the photo. And the tools (and their effectiveness) tin disagree successful older versions of the program.
The Answer to All My Picture Problems: Invisible Tables
Compared to dealing with pictures, moving with tables successful Microsoft Word is simply a breeze. They determination easily, you tin resize them to acceptable the width of the page, and you tin alteration the table's paragraph settings truthful that they behave reliably and precisely arsenic you want. Also, tables enactment successful spot comparative to the text, truthful you tin remainder assured that they won't leap astir arsenic you edit your work.
That's wherefore I ever spot my images wrong tables successful Microsoft Word—and erstwhile I'm done, I simply region the table's borders.
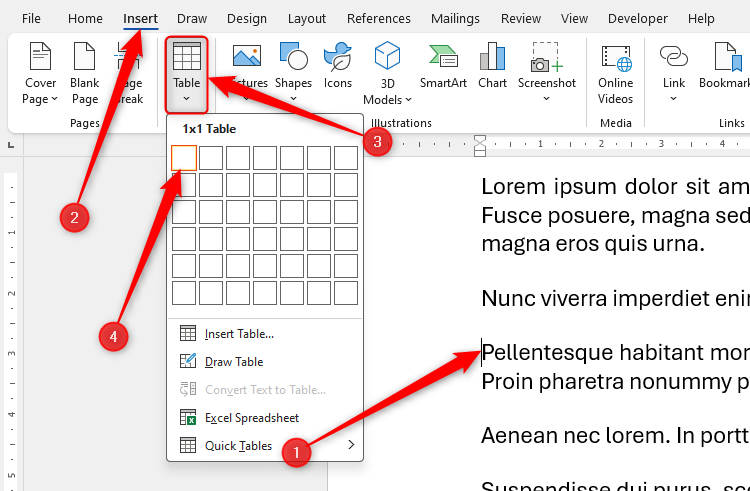
First, spot your cursor wherever you privation the representation to go. Then, successful the Insert tab connected the ribbon, click "Table," and take a 1 x 1 structure.
Related
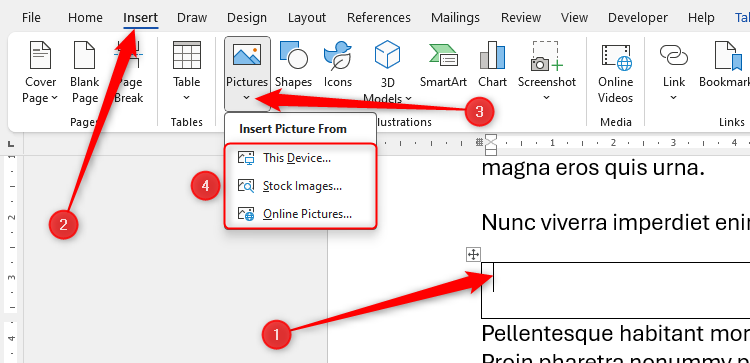
Now, with your single-row-single-column array added, and the cursor placed within, click "Pictures" successful the Insert tab connected the ribbon, and find and insert your image.
Now that the representation is inserted wrong a array cell, determination are respective steps to instrumentality to customize however it looks and behaves.
Add Spacing After the Picture
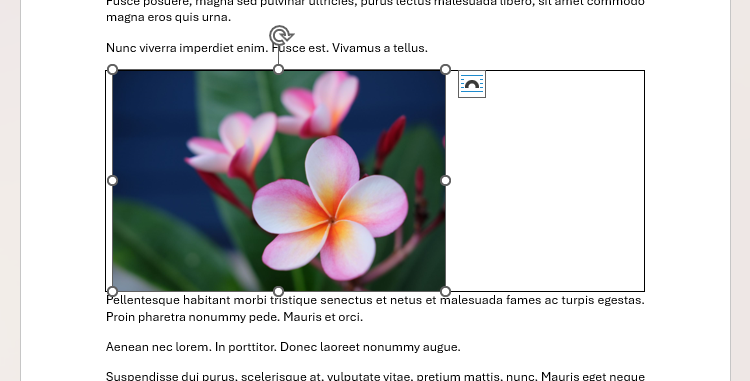
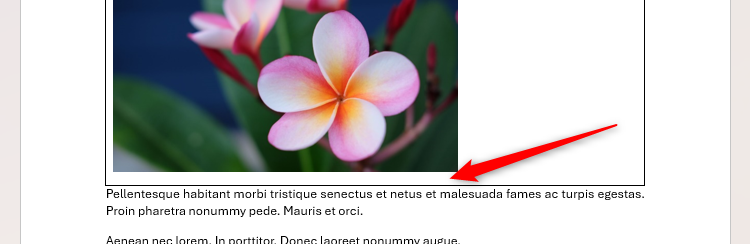
In the illustration above, determination isn't a spread betwixt the bottommost of the representation and the adjacent enactment of text, truthful this is the archetypal happening that needs to beryllium addressed to amended however it looks. To bash this, hover your cursor implicit the table, and click the crosshairs fastener that appears successful the top-left country to prime the full array and its contents. Then, successful the Home tab connected the ribbon, click the "Paragraph Settings" dialog container launcher.
Now, successful the Indents And Spacing tab of the Paragraph dialog box, lucifer the Spacing After measurement with the font size utilized for your document's assemblage text. Doing this helps guarantee the spacing betwixt the images and each paragraph is consistent. In my case, my mean benignant substance is 11 pt, truthful that's what I'll benignant into the Spacing After field. Then, click "OK."

Notice that a enactment abstraction present separates the representation from the substance that follows.
You mightiness beryllium wondering wherefore you can't conscionable property Enter astatine the commencement of the paragraph beneath the array to make the other space. The crushed to debar this is that by pressing Enter, you're creating an bare paragraph marker, which could impact your document's structural integrity down the line.
Wrap Text Around the Picture
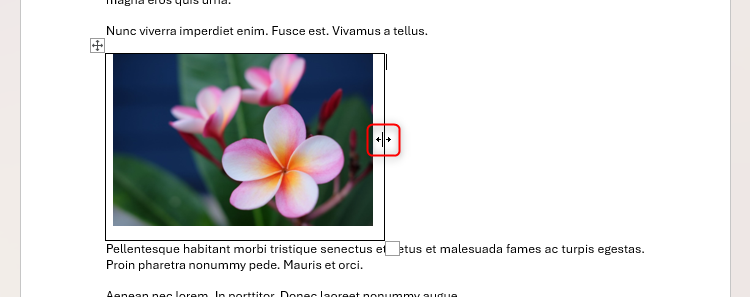
The adjacent alteration I privation to marque to my representation is to alteration however it behaves wrong the text. Specifically, I privation the representation to beryllium astir fractional the width of the substance paragraphs, and the substance to wrapper astir it. If you privation to bash the same, prime the representation and usage a country grip to shrink it to the desired size portion maintaining its proportions.

Next, click and resistance the borderline of the array truthful that it neatly surrounds the image's caller size.
Now, you request to set the table's text-wrapping properties. To bash this, hover implicit the array and, this time, right-click the crosshairs fastener successful the top-left corner. Then, prime "Table Properties."
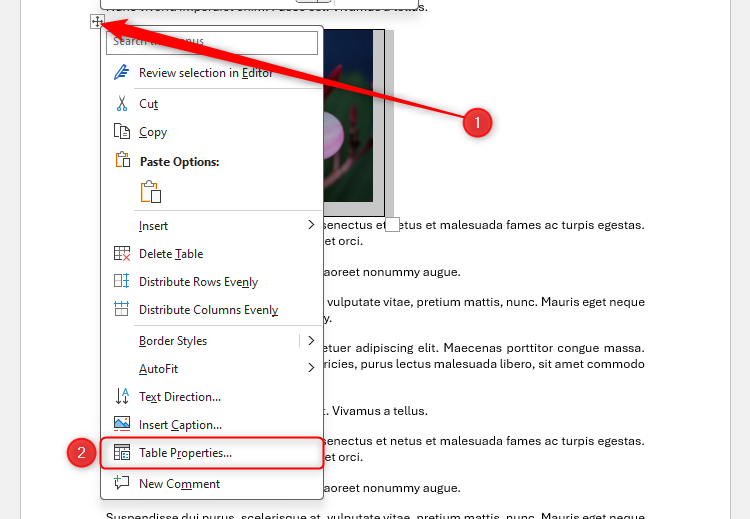
In the Table tab of the Table Properties dialog box, prime "Around" successful the Text Wrapping options, and click "OK."

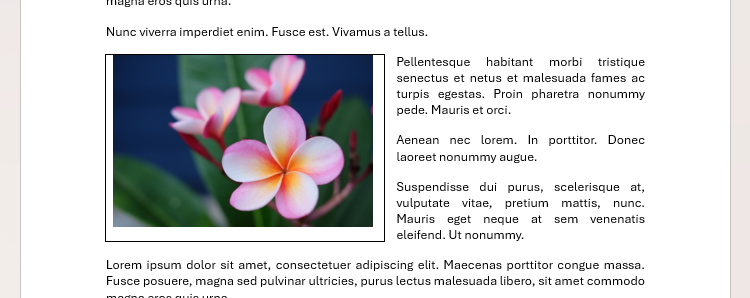
Now, the substance is neatly wrapped astir the image, and due to the fact that the representation is encased successful a table, there's an capable spread betwixt the close borderline of the representation and the substance sitting adjacent to it. You could besides marque this spread larger oregon smaller by simply readjusting the positioning of the close borderline of the array cell.
Move and Align the Picture
Once your representation is the close size, you tin simply click and resistance the crosshairs icon successful the top-left country of the array to reposition it to wherever works champion for you. Yes, you tin bash this with images that aren't contained wrong tables, too, but getting the precise presumption is overmuch much straightforward utilizing this method.
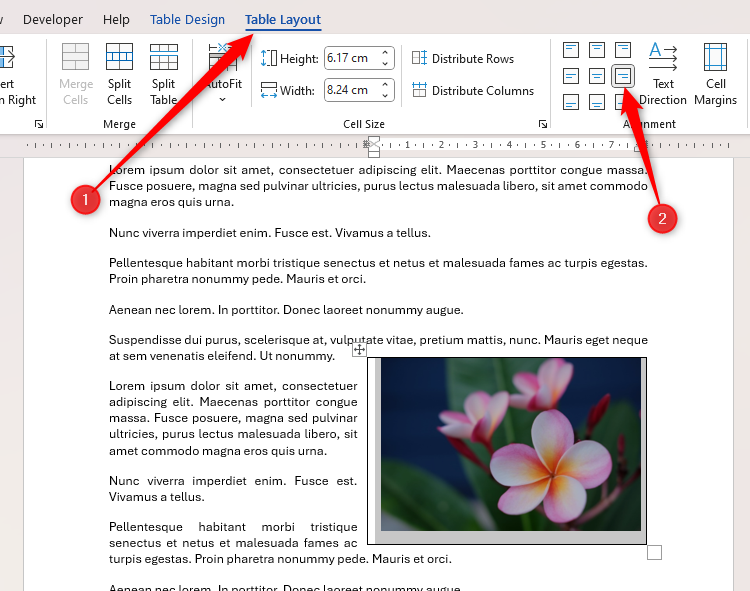
In the illustration below, I've moved the array to the close of my page, and right-aligned the representation successful the Table Layout tab connected the ribbon truthful that it aligns much intimately with the close borderline of the justified text.
Add a Caption to the Picture
Next, let's accidental you wanted to adhd a caption beneath a representation successful your Word document. Once again, this is wherever utilizing a array tin prevention the day.
Yes, you tin right-click an representation and prime "Insert Caption," but successful my acquisition arsenic an world proofreader and ineligible papers producer, this method results successful sedate inconsistencies and awkward formatting issues.
Instead, with your representation already added to a single-cell table, successful the Table Layout tab, click "Insert Row Below."
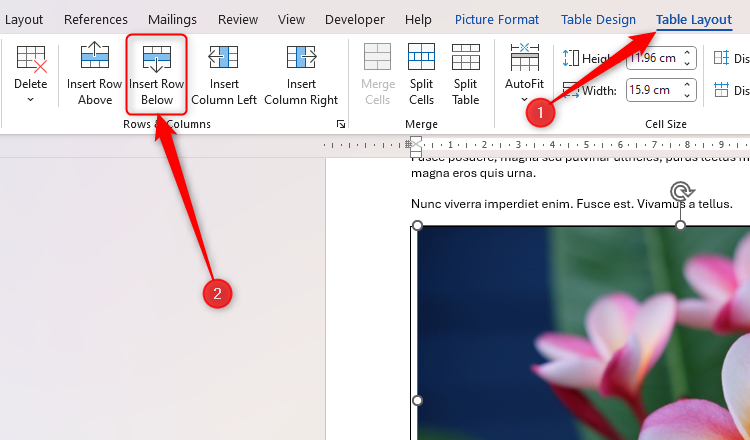
Now, successful the caller enactment you conscionable added, benignant the caption.

There are 2 much steps I urge you instrumentality astatine this stage.
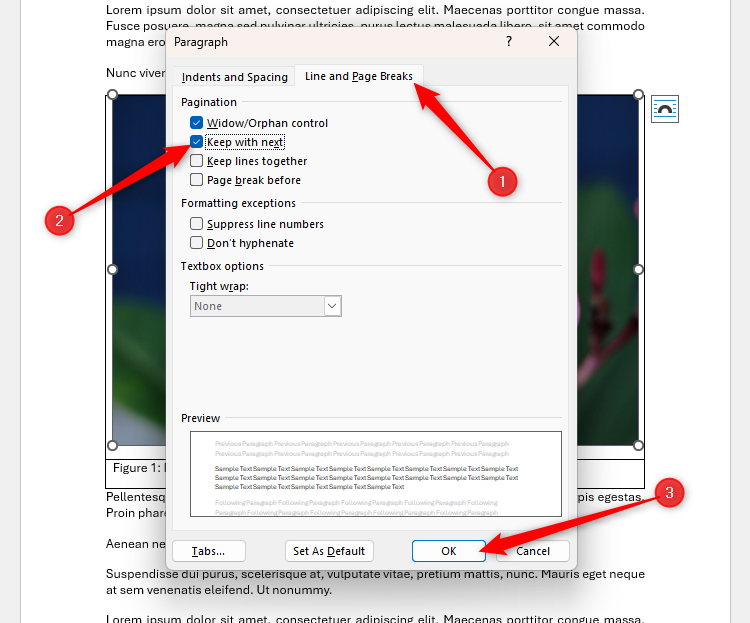
First, you privation to guarantee that the 2 cells of the array (the precocious compartment containing the representation and the little compartment containing the caption) enactment together. In different words, if you don't marque the pursuing adjustments, the caption compartment could determination to the adjacent page, with the representation compartment staying connected the erstwhile one. To forestall this from happening, prime the picture, and successful the Home tab connected the ribbon, click the "Paragraph Settings" dialog container launcher icon.
Now, unfastened the "Lines And Page Breaks" tab of the Paragraph dialog box, cheque "Keep With Next," and click "OK." This means that the representation you selected is efficaciously glued to the substance successful the enactment below, truthful they'll ne'er beryllium divided up by a earthy leafage interruption successful your document.
If you privation the representation and its caption to enactment with the paragraph underneath the table, use the Keep With Next mounting to the caption, too.
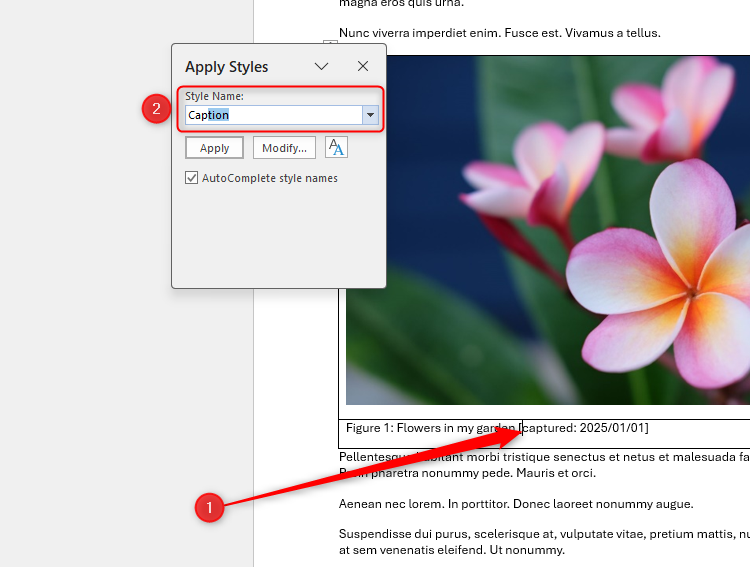
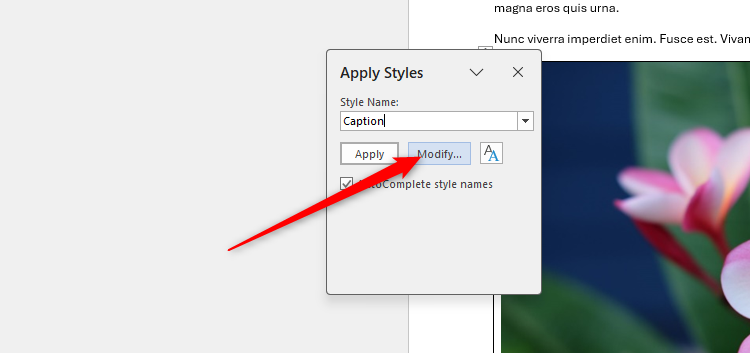
The last measurement you should instrumentality is to alteration the caption's style. With your cursor anyplace successful the caption's text, property Ctrl+Shift+S to motorboat the Apply Styles dialog box, and successful the Style Name field, benignant the archetypal fewer letters of the connection "Caption."
Related
Once the connection "Caption" is autocompleted, click "Modify."
Next, alteration the font formatting truthful the caption is presented otherwise from your mean style. Personally, I similar my captions to beryllium italicized and acheronian bluish with halfway alignment. Also, click "Format" successful the bottom-left country of the Modify Style dialog container to set different settings, similar making definite there's a abstraction aft the caption text.
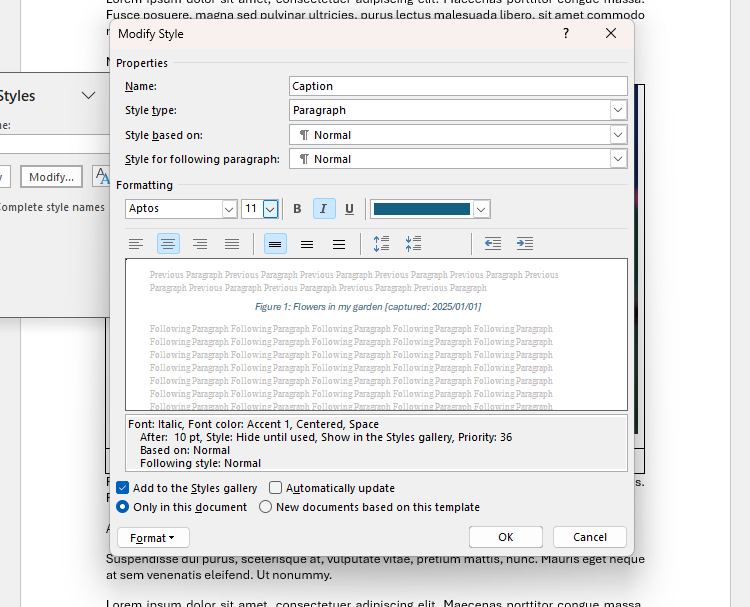
When you're done, click "OK" to spot this caller benignant applied to the caption you typed earlier.
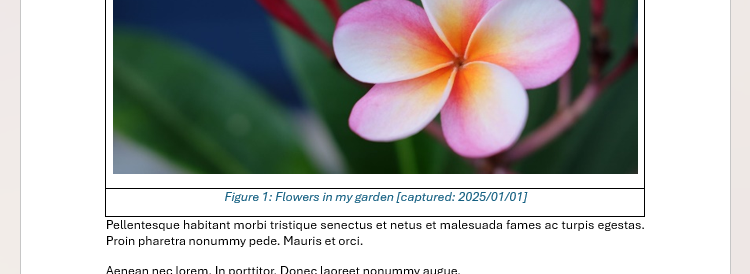
You tin present use this benignant formatting to immoderate different captions you adhd to images successful tables successful the remainder of your document.
If you add a array of figures to your papers by clicking References > Insert Table Of Figures, click "Options," cheque "Style," and guarantee "Caption" is selected. This means that erstwhile Word generates your array of figures, it'll prime up immoderate substance successful this style.
Insert a Gallery of Pictures
If you're not yet convinced that utilizing tables is the champion mode to signifier your pictures successful Microsoft Word, I situation you to insert images adjacent to each different without them behaving erratically! It's difficult, right? Of course, the reply to this occupation is to usage a table!
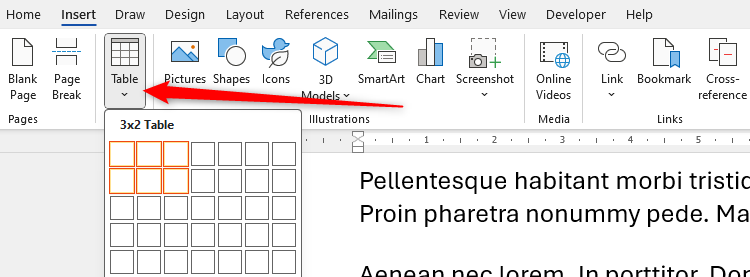
Let's accidental you wanted a assemblage of six photos crossed 2 rows. First, adhd your 3x2 array done the Table drop-down paper successful the Insert tab connected the ribbon. If you privation to adhd captions nether each representation utilizing the method I outlined above, prime 4 rows alternatively of two.
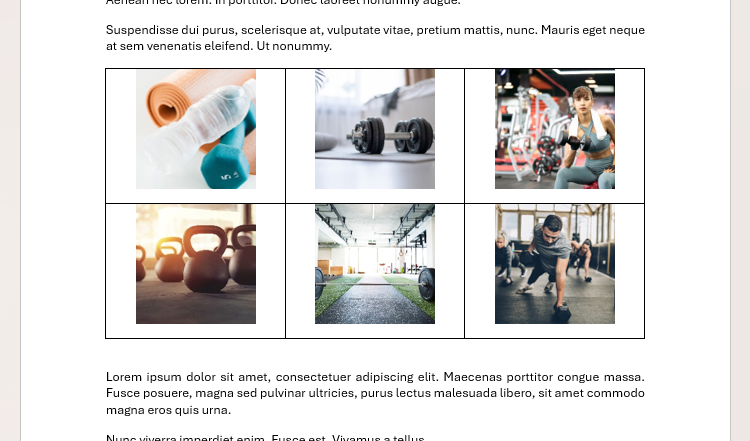
Then, erstwhile you've adjusted the Spacing After, and made immoderate different formatting and behavioral changes to your table, simply insert your pictures into each cell. The cardinal is to marque definite each representation is encased successful a abstracted cell, truthful that you tin marque changes to its size, shape, and formatting without affecting immoderate of the different pictures you added.
Use Microsoft Word's Crop tool successful the Picture Format tab connected the ribbon to resize the images to the aforesaid facet ratio and, thus, execute consistency.
Remove the Borders
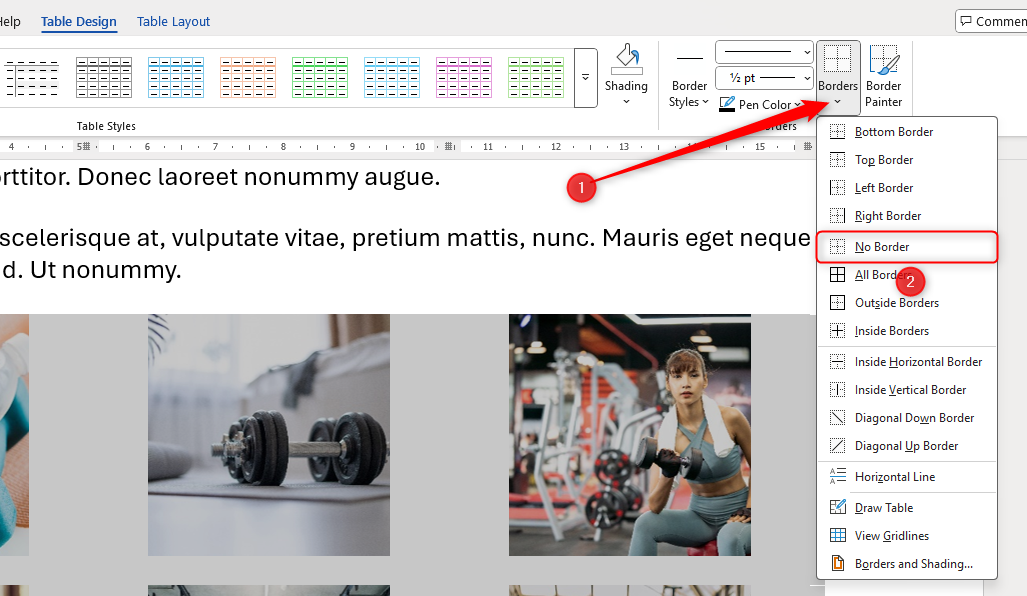
The last measurement to making your images look the portion is to remove the borders from the table. Click the crosshairs fastener to prime the full table, and successful the Table Design tab connected the ribbon, click Borders > No Border.
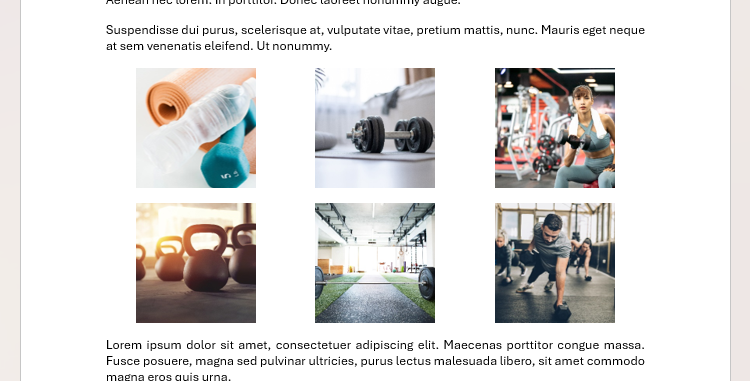
Now, instrumentality a infinitesimal to admit however the images volition look erstwhile you people the document.
To spot the table's borders connected your surface without them being disposable erstwhile you people the document, prime the table, and click "View Gridlines" successful the Table Layout tab connected the ribbon.
Having tons of images successful a papers tin importantly summation the size of the record and, thus, dilatory down its performance. To resoluteness this, you tin compress pictures successful Microsoft Word to trim the abstraction they instrumentality up.


 English (US) ·